Your account is set up.
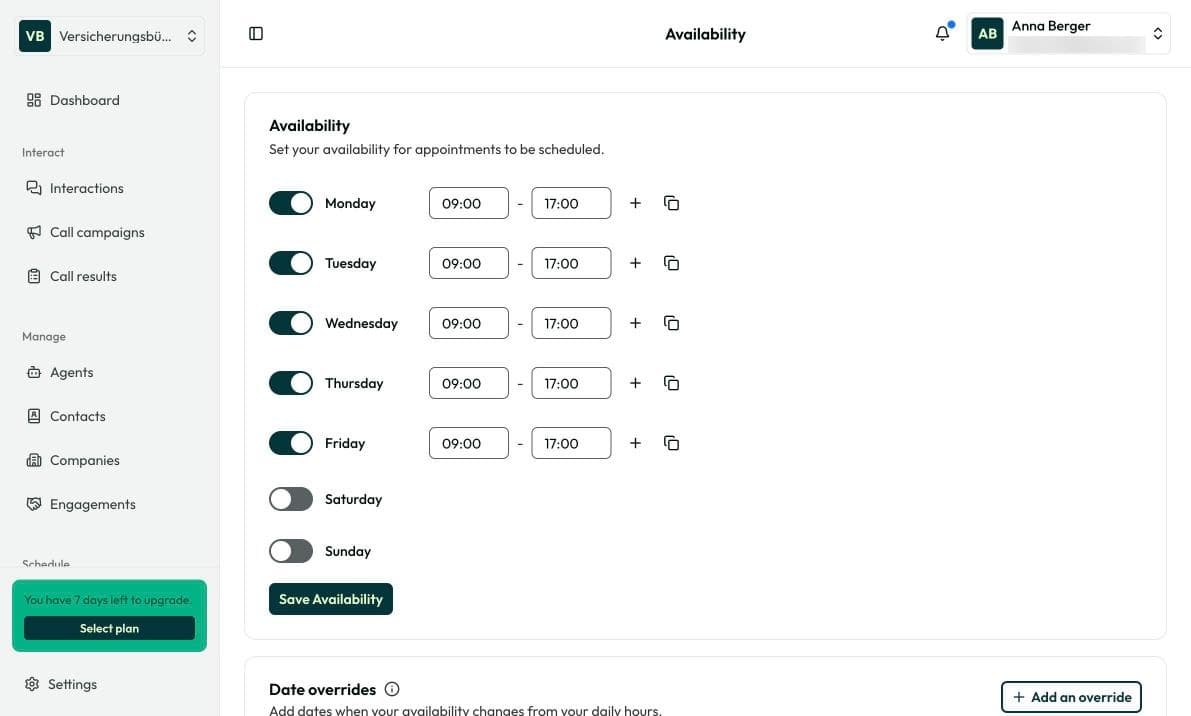
1. Check your availability
You set your hours during setup. You can change them under Schedule › Availability. Under Date overrides you add days with different hours, for example a holiday.
2. Connect your calendar
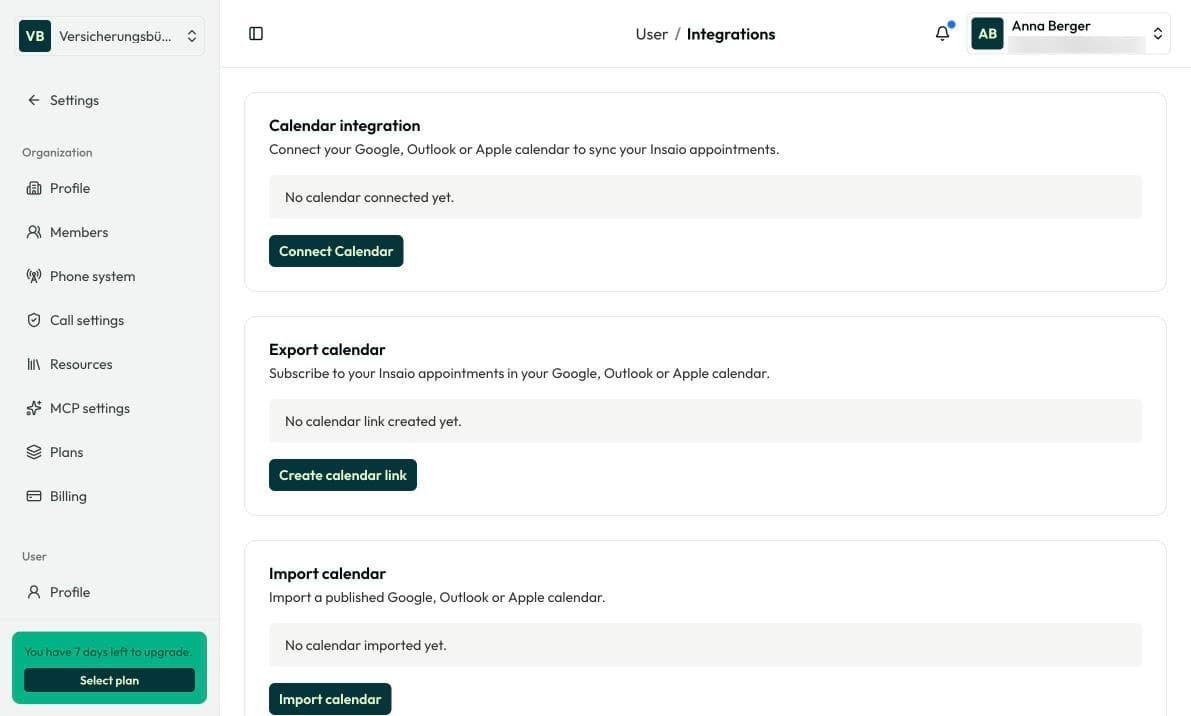
Under Settings › User › Integrations you connect your Google, Outlook or Apple calendar. Booked appointments then show up directly in your calendar. For online appointments you can also connect Google Meet, Microsoft Teams or Zoom.
3. Create an event type
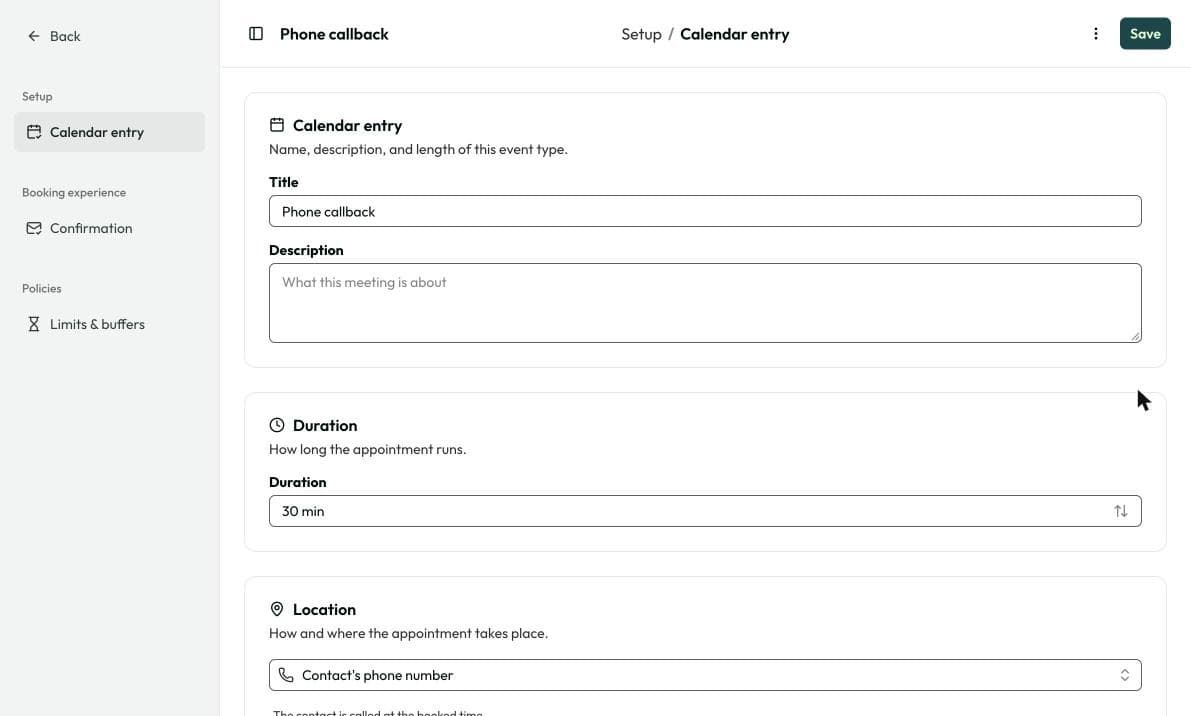
Open Schedule › Event types and click Create first event type. Enter a title, for example “Phone callback”, check the Duration and choose the Location: phone, video conference or in person. Click Save.
4. Set confirmation and buffers
By default, you confirm every booking before it is fixed in your calendar. Under Limits & buffers you set how short-notice (default: 2 hours ahead) and how far in advance (default: 30 days) people can book.
Frequently asked questions
Check that your availability has hours in the next few days and that the minimum notice isn’t too long.
No, but it helps. Without a calendar, your agent only knows your availability, not your other appointments.